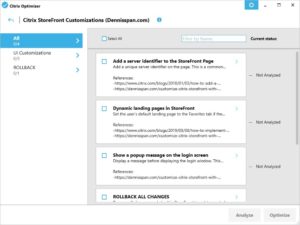
In this article, I want to show you how to customize Citrix StoreFront with Citrix Optimizer using a custom template I created.
There are many interesting customizations available for Citrix StoreFront. I decided to play around a bit and see if it is possible to add some of these customizations to a template for Citrix Optimizer. It took me longer than I thought it would, but I got the job done.
I added the following customizations to the template:
- Add a Server Identifier to the StoreFront Page Footer (Citrix Blog)
- Dynamic landing pages (Citrix Blog)
- Show a popup message on the login screen
You can download the template right here:
You can also download the template from the community marketplace created by CTP Ryan Butler.
To connect to this marketplace, go to Template Marketplace in the GUI, click on +Add New Marketplace, and enter the following URL:
https://raw.githubusercontent.com/ryancbutler/Citrix_Optimizer_Community_Template_Marketplace/master/communitymarketplace.xml
Here are some “need to knows” about the template and the PowerShell code it contains:
- This template has been created for:
- Citrix Optimizer 2.6.0.120 and higher
- Citrix StoreFront 3.16 (released in August 2018) and later
- All customizations have been tested on StoreFront 3.16 and StoreFront 1909
- All PowerShell code was written in Visual Studio Code (can be downloaded here) and then copied to the Analyze or Execute section in the Citrix Optimizer Template Builder.
- For the sake of readability, I recommend that you copy the PowerShell code from the Citrix Optimizer Template Builder in an external source code editor such as Visual Studio Code. If you are new to creating custom templates for Citrix Optimizer then I recommend that you read the article Creating a custom template for Citrix Optimizer on this website.
- In case you would like to make changes to the PowerShell code, I recommend that you copy the PowerShell code from the Citrix Optimizer Template Builder in an external source-code editor such as Visual Studio Code After you have made your changes, copy the entire code back in the Analyze or Execute section.
- I have taken special care that potentially conflicting customizations can still work together at the same time. I found the following conflicting customizations:
- Add a server identifier to the StoreFront Page Header and Dynamic landing pages in StoreFront. The reason for this conflict is that both customizations are called in the CTXS.Extensions.afterDisplayHomeScreen extension.
- An input window appears for each customization that is to be executed.

This input window requires you to enter the full path to the StoreFront web store. To make life easier, the most recently entered path is automatically added in the input window. This path is stored in the registry, here to be exact:- Key: HKEY_CURRENT_USER\Software\Dennisspan.com
- Value: CitrixOptimizer_PathToStore
- Data (example): C:\inetpub\wwwroot\Citrix\StoreWeb
- Before any changes are made, a backup (copy) of the following files is made:
- C:\inetpub\wwwroot\Citrix\%StorePath%\custom\script.js
- C:\inetpub\wwwroot\Citrix\%StorePath%\custom\style.css
- The template includes a rollback option that removes all changes made by the template. See the Rollback section for more information.
Let’s take a closer look at the optimizations included in the template.
Add a server identifier to the StoreFront Page Header
Reference: https://www.citrix.com/blogs/2018/01/03/how-to-add-a-server-identifier-to-the-storefront-page-footer/ (02.02.2025: link no longer available)
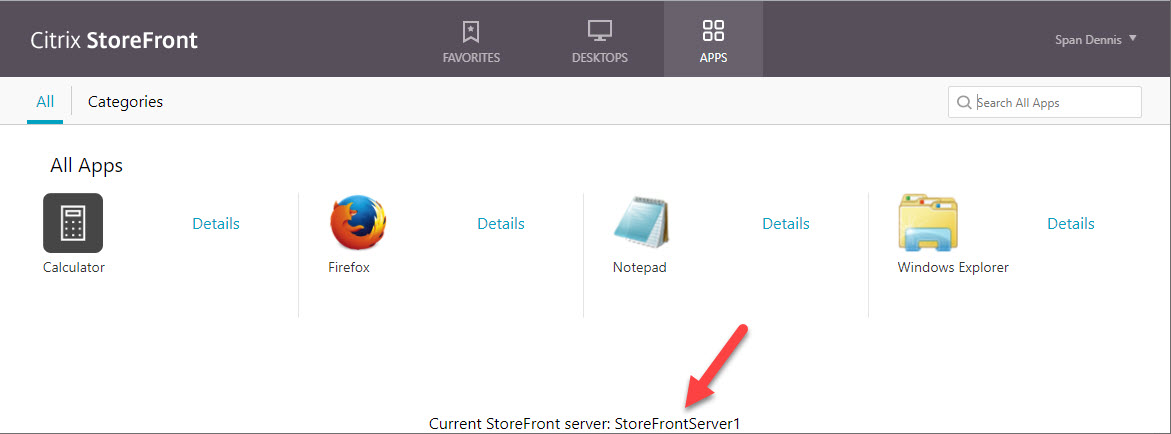
This customization adds a unique server identifier on the page footer. To be more specific, the text Current StoreFront server: %ServerName% is displayed in the footer of the StoreFront web page. The name of the current StoreFront server is retrieved dynamically instead of having to enter it hard-coded in IIS.
The prerequisites for this customization to work are:
- StoreFront version 3.16 (released in August 2018) or higher.
The PowerShell code in the Citrix Optimizer template modifies or creates the following files:
- C:\inetpub\wwwroot\Citrix\%StorePath%\custom\script.js
- C:\inetpub\wwwroot\Citrix\%StorePath%\custom\style.css
-
C:\inetpub\wwwroot\Citrix\%StoreWeb%\customweb\DS_ServerIdentifier.aspx (this is a new file that did not exist before)
I choose to place the text in the page footer, but you can change the location to for example the header, like this:
To accomplish this, you have to change the value #customBottom to #customTop in the PowerShell code. This value appears twice in the PowerShell script, so you have to change it twice.
One value is added to the file script.js:
And one value is added to the file style.css:
To be more precise, follow these steps:
- Open the Citrix Optimizer Template Builder
- Click the Edit button next to this particular customization
- Copy the PowerShell code from the Execute section to an external script editor
- Search for the word #customBottom
- Change the word to #customTop
- Repeat the previous two steps
- Copy the entire code block back to the Execute section in the Citrix Optimizer Template Builder and save the template.
Speaking of the file style.css. This file is responsible for the layout of the text, including font size, font color, the position of the text (left, center, or right,) and more. You can customize this file according to your requirements.
Another thing you may want to change is the output of the server name. Perhaps you only want to display a portion of the server name. This also requires a change in the PowerShell code. For this change, the steps are as follows:
- Open the Citrix Optimizer Template Builder
- Click the Edit button next to this particular customization
- Copy the PowerShell code from the Execute section to an external script editor
- Search for the words return server
- Change the words to one of the examples below
- Copy the entire code block back to the Execute section in the Citrix Optimizer Template Builder and save the template.
Let me give you a couple of examples of what you could present to the user.
Example 1: Read the first five characters of the server name
Replace the words return server for
return server.Substring(0,5)
The value 0 means that you want to read from the first character of the server name. The second value defines how many characters from the starting point you want to read, which is 5 in our example.
The server name in this article is StoreFrontServer1. Setting the starting point to 0 and the second value to 5 results in Store (StoreFrontServer1).
Example 2: Skip the first two characters in the server name
Replace the words return server for
return server.Substring(2)
The number 2 determines that the first two characters of the server name are skipped. The server name in this article is StoreFrontServer1. Setting the starting point to 2 results in oreFrontServer1 (StoreFrontServer1).
Example 3: Read the last two characters from the server name
Replace the words return server for
return server.Substring(server.Length-1)
In this example, we dynamically calculate the total number of characters in the server name (server.Length) and deduct 1. The server name in this article is StoreFrontServer1. Setting the starting point to server.Length-1 results in 1 (StoreFrontServer1). To display the last two characters of the server name, simply replace the 1 with a 2, for three characters 3, and so forth.
Example 4: Read the middle part of the server name
Replace the words return server for
return server.Substring(5,5)
In this example, we skip the first 5 characters of the server name. Starting at the sixth character, we then read the following 5 characters. The server name in this article is StoreFrontServer1. Setting the starting point to 5 and only reading the subsequent 5 characters results in Front (StoreFrontServer1).
One more thing. This customization is in direct conflict with the customization Dynamic landing pages in StoreFront. The reason for this conflict is that both customizations need to be called in the CTXS.Extensions.afterDisplayHomeScreen extension. To avoid this conflict I added additional PowerShell code to check whether or not the Dynamic landing pages in StoreFront have been set. If yes, the server identifier customization is added to the existing CTXS.Extensions.afterDisplayHomeScreen extension-call so both customizations are processed together.
Dynamic landing pages in StoreFront
Reference: https://www.citrix.com/blogs/2019/08/08/how-to-implement-dynamic-landing-pages-in-storefront/
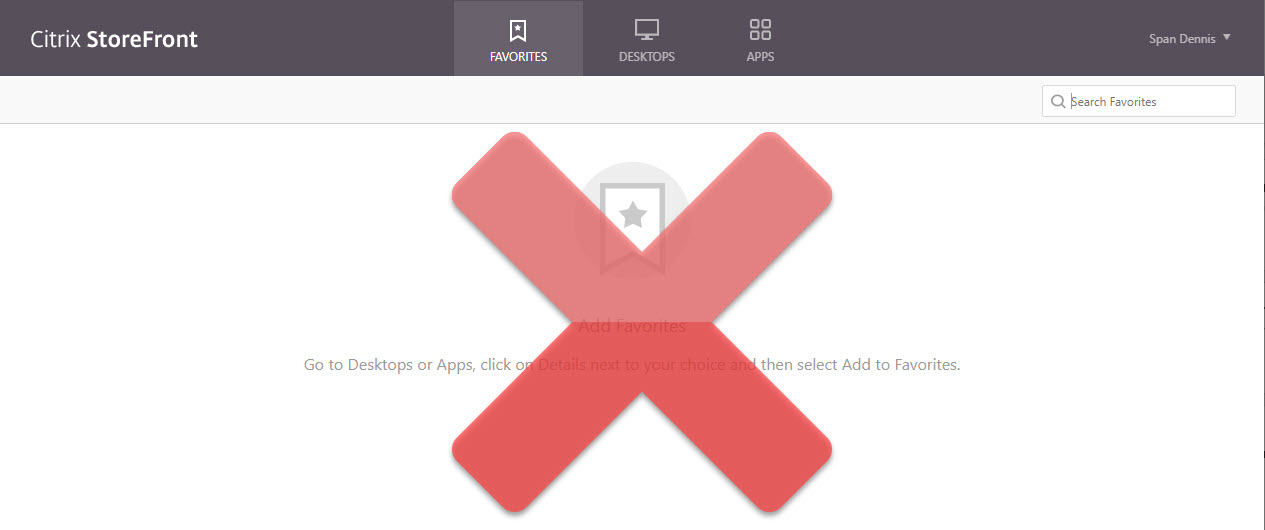
Set the user’s default landing page to the Favorites page if the user has selected at least one application as a favorite. Otherwise, set the landing page to the Apps page. By default, the user lands on the Favorites page, even when the user has no favorites.
A more detailed description of this customization can be found in the original Citrix article.
The prerequisites for this customization to work are:
- StoreFront version 3.16 or higher.
- On the store, the setting Enable User Subscriptions (Self Service Store) must be enabled. If this setting is set to disabled, the Favorites page is not shown since all resources are mandatory.

- On the Receiver for Web site make sure to disable the classic experience. The classic experience (the “green bubbles” theme) displays the desktop page as the default page.

- On the Receiver for Web site make sure to set the default view of applications and desktops to Auto.
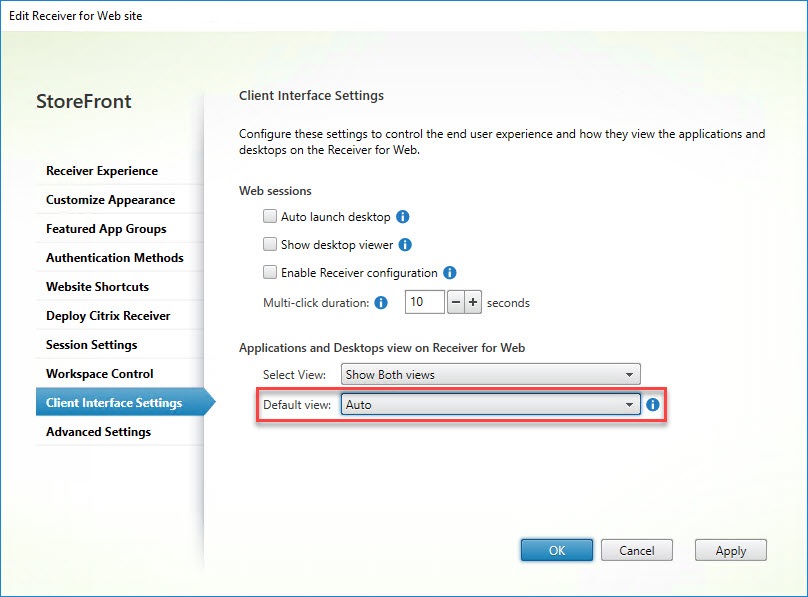
The PowerShell code in this template makes changes to the following file:
- C:\inetpub\wwwroot\Citrix\%StorePath%\custom\script.js
In the PowerShell code, I set the favorites threshold to 1. This results in the following behavior: if the user has not set any favorites, the Apps page is displayed. This happens both at logon and when the user refreshes the browser window (F5). Also, when the empty Favorites page is displayed and the user hits refresh the Apps page is displayed. If the user has at least one favorite configured, at logon or refresh the Favorites page is displayed.
The favorites threshold can be changed in the PowerShell code:
- Open the Citrix Optimizer Template Builder
- Click the Edit button next to this particular customization
- Copy the PowerShell code from the Execute section to an external script editor
- Search for the word favoriteThreshold
- Change the number from 1 to whatever you require it to be.
- Copy the entire code block back to the Execute section in the Citrix Optimizer Template Builder and save the template.
If you want your users to be redirected to the Desktops page instead of the Apps page, please do the following:
- Open the Citrix Optimizer Template Builder
- Click the Edit button next to this particular customization
- Copy the PowerShell code from the Execute section to an external script editor
- Search for the line CTXS.ExtensionAPI.changeView(“store“)
- Change the line to CTXS.ExtensionAPI.changeView(“desktops“)
- Copy the entire code block back to the Execute section in the Citrix Optimizer Template Builder and save the template.
One more thing. This customization is in direct conflict with the customization Add a server identifier to the StoreFront Page Header. The reason for this conflict is that both customizations are called in the CTXS.Extensions.afterDisplayHomeScreen extension. To avoid this conflict I added additional PowerShell code to check whether or not the Add a server identifier to the StoreFront Page Header has been set. If yes, the dynamic landing page customization is added to the existing CTXS.Extensions.afterDisplayHomeScreen extension so both customizations are processed together and thus are both active.
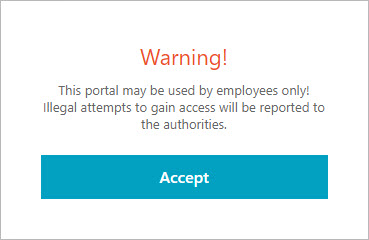
Show a popup message on the login screen
This customization shows a popup message on the login screen. The message can be customized to show any text your organization requires. The following screenshot is an example of such a custom message.
The prerequisites for this customization to work are:
- StoreFront version 3.16 (released in August 2018) or higher.
The PowerShell code in the Citrix Optimizer template modifies or creates the following files:
- C:\inetpub\wwwroot\Citrix\%StorePath%\custom\script.js
The PowerShell code for this customization is already included in the script.js file, but it is disabled by default. To change the text:
- Open the Citrix Optimizer Template Builder
- Click the Edit button next to this particular customization
- Copy the PowerShell code from the Execute section to an external script editor
- Search for the word “messageTitle”
- Change the message title
- Search for the word “messageText”
- Change the message text
- Copy the entire code block back to the Execute section in the Citrix Optimizer Template Builder and save the template.
Rollback
I thought long and hard about how to do a per-item rollback, but I came to the conclusion that this was not feasible. I therefore decided to offer a complete rollback only.
What this means is that all changes made by my StoreFront template will be reverted. The rollback option does not offer to revert an individual customization. The files that are involved in StoreFront customizations are the following:
- C:\inetpub\wwwroot\Citrix\%StorePath%\custom\script.js
- C:\inetpub\wwwroot\Citrix\%StorePath%\custom\style.css
- C:\inetpub\wwwroot\Citrix\%StorePath%\customweb -> one or more custom files
Before the template makes any changes to the current StoreFront configuration, a backup (copy) is made of the files script.js and style.css. The file copy is done in the same directory where the original files are stored. The names of the backup files are as follows:
- C:\inetpub\wwwroot\Citrix\%StorePath%\custom\script_DS_copy_of_original.js
- C:\inetpub\wwwroot\Citrix\%StorePath%\custom\style_DS_copy_of_original.css
When initiating a rollback, the files script.js and style.css are deleted and the backup files script_DS_copy_of_original.js and style_DS_copy_of_original.css are renamed to respectively script.js and style.css.
Also, any custom file in the directory C:\inetpub\wwwroot\Citrix\%StorePath%\customweb is deleted. All custom files created by the StoreFront template start with DS_, which makes them easily identifiable.
And lastly, the registry key HKEY_CURRENT_USER\Software\Dennisspan.com is deleted.
Conclusion
As always, first test the template in a test environment before using it in production.
Please contact me in case the template does not work as expected. I have of course tested the template, but I cannot test it on all versions of StoreFront.
Dennis Span works as a Principal Account Technology Strategist at Cloud Software Group in Vienna, Austria. He holds multiple Citrix certifications (CCE-V). Dennis has been a Citrix Technology Advocate (CTA) since 2017 (+ one year as Citrix Technology Professional, CTP). Besides his interest in virtualization technologies and blogging, he loves spending time with his family as well as snowboarding, playing basketball, and rowing. He is fluent in Dutch, English, German, and Slovak and speaks some Spanish.







Hello,
work this tool on a german Storefront-Server?
I have the error:
Failed! Execution stopped by template condition: The customizations in this template only apply to Citrix StoreFront. The Citrix StoreFront service is not present on the local system
What is the solution?
Thanks…
Hi Jens,
Good point. Can you check one thing for me. In the template I check whether or not the current server is a StoreFront server. In this check I execute the following PowerShell command: Get-Service CitrixStoreFront
Can you please check for me what is the result when you execute this command on your StoreFront server? Is the name of the service different on a German installation? If yes, I will have to make a small update in the template.
Thanks!
thank you Dennis, Nice Work
Thanks a lot Danny!
Pingback: EUC Weekly Digest – December 21, 2019 – Carl Stalhood
Hi, the german Version does not work with this template. Is the german Name for that Service “CitrixSubscriptionStore” ??
I can’t find a Service that called “CitrixStorefront”.
Regards
Hermann
Hi Hermann. My apologies for my very late reply. I need to make an update to my template. Currently, when the template is executed it checks whether or not StoreFront is installed. A condition in the template checks whether or not the StoreFront service exists. I guess the name of the service is different when it is installed in German. I need to update the template with a different check to avoid language issues. I will try to update the template this week(end).