In this article, I would like to share with you an idea about creating a custom management console for your Citrix tools. I have been using a modified Microsoft Management Console (MMC) since XenApp 6.5 and I am using the same solution for my latest XenDesktop 7.18 environment running on Windows Server 2016.
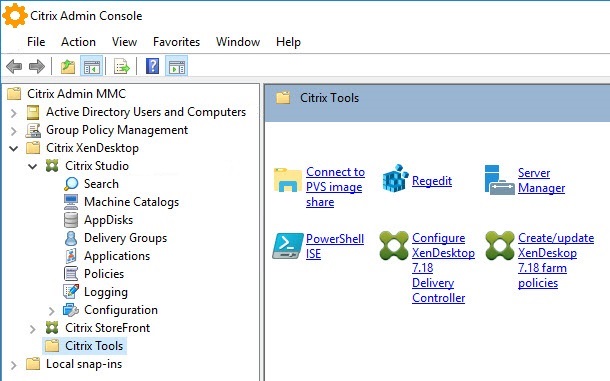
Before I go into detail, let me show you an example of what I am talking about. Below you see a custom MMC with a number of well-known snap-ins, including the snap-ins for Citrix Studio and StoreFront as well as a number of tools.
The tools listed in the example above are the following (from left to right):
- A shortcut to the Provisioning Server image share
- Regedit
- Server Manager
- The PowerShell ISE
- A shortcut to a PowerShell script that configures my XenDesktop 7.18 site / farm
- A shortcut to a PowerShell script that creates or updates the XenDesktop 7.18 site policies
What I like about this solution is that it is simple to create, simple to operate, simple to expand and it is for free. In the following sections I will explain how to create such a custom console:
- Create a custom Microsoft Management Console (MMC)
- Add snap-ins
- Create taskpad and first taskpad item
- Edit MMC, edit taskpad and add more tasks
- Copy source files to the local machine
Create a custom Microsoft Management Console (MMC)
The first step is to create a custom MMC:
- Execute the mmc.exe. You are presented with an empty MMC.
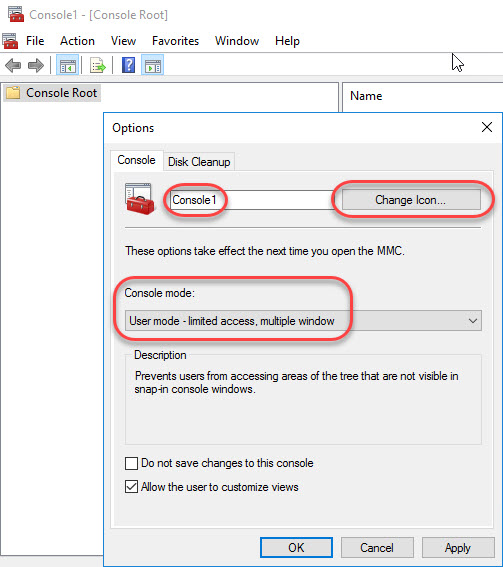
- Go to File \ Options:
- Define a name for your console
- Change the icon
- Set the console mode to User mode – limited access, multiple window. This is the mode the console is in after you save it. To edit the console, select Author Mode on the context menu of the console (right-mouse click).
- I suggest to allow users to save changes to this console (this does not give them the right to modify the console) and to allow the use of customize views.
Add snap-ins
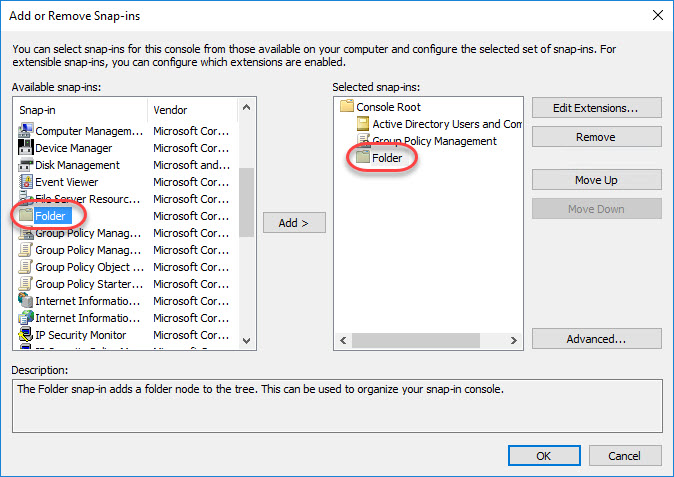
Now it is time to add your favorite snap-ins. Go to File \ Add/Remove Snap-in to add your snap-ins. Now I am guessing that you are quite familiar with this procedure, but did you know you can add custom folders and that you can change the parent folder of snap-ins?
There is an actual snap-in called Folder. Select Folder and add it to your list of selected snap-ins. You cannot rename the folder just yet (only after you close the Add or Remove Snap-ins window).
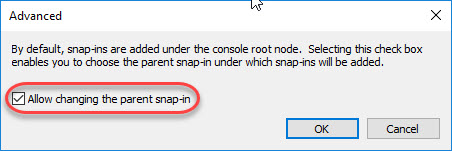
It is possible to change the parent snap-in for any snap-in you want to add. First, click the Advanced button and tick the box Allow changing the parent snap-in.
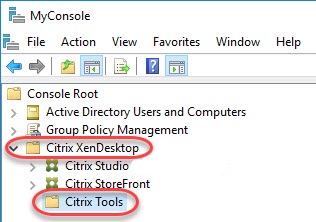
You will now see a new drop-down menu in the main window called Parent snap-in. In the example below, I selected the Folder snap-in as the parent and afterwards I added the Citrix Studio and StoreFront snap-in as child items. You have to set the parent snap-in before you add any child items.
I also added an additional folder under Citrix StoreFront and clicked OK to close the Add or Remove Snap-ins window.
In the main MMC window it is possible to rename the custom folders.
Create Taskpad View and Taskpad Items
Now that we have selected our snap-ins it is time to add our custom applications, tools, shares, scripts and what not.
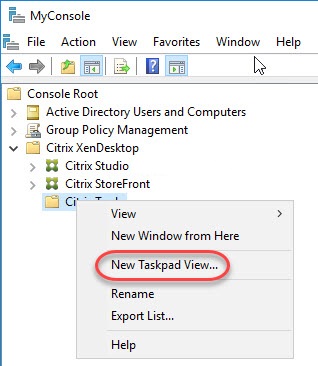
We start by creating a so-called taskpad view. You can create a taskpad view on almost all snap-ins, except for Citrix Studio and StoreFront. This is the reason why we created an additional folder. With a right-mouse click on either the folder Citrix XenDesktop or Citrix Tools select New Taskpad View.
In the first window you need to choose a style. I suggest that you play around with this a bit to find the best option for your environment. Click Next.
In the following window choose whether or not the taskpad is visible on all snap-ins or only in the current tree item. Choose Selected tree item in case you would like to create multiple taskpads on different levels. Click Next.
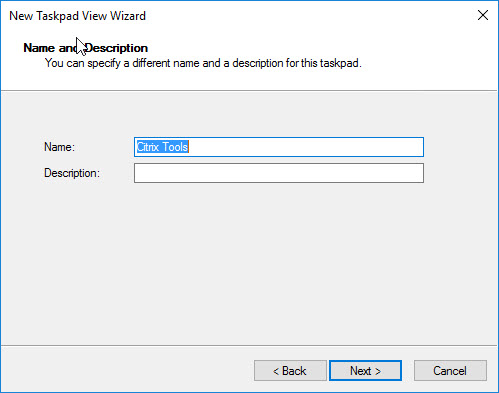
Give the taskpad a name.
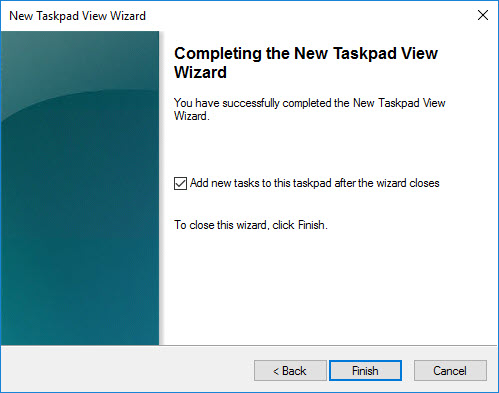
When the box Add new tasks to this taskpad […] is selected, a second wizard will start, allowing you to create tasks to add to your taskpad. If you do not run this second wizard right away, the taskpad will initially be empty. Of course, you can always add tasks at a later time. Let’s continue with the second wizard and add at least one task. Click Finish.
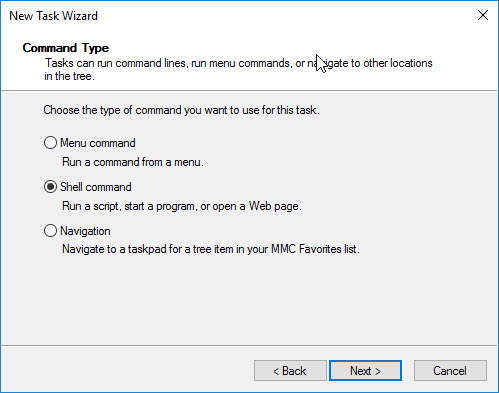
In the New Task Wizard, select Shell command. I personally do not use the other two options. Click Next.
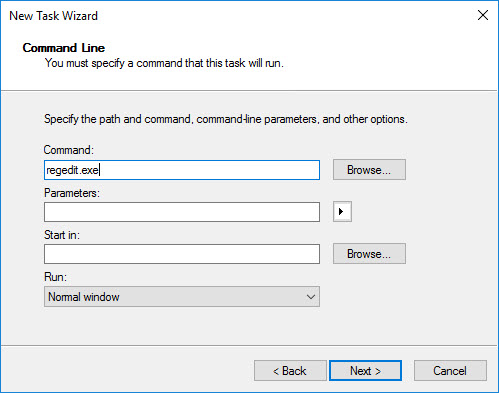
In this example we will add Regedit to our taskpad. Enter regedit.exe and click Next.
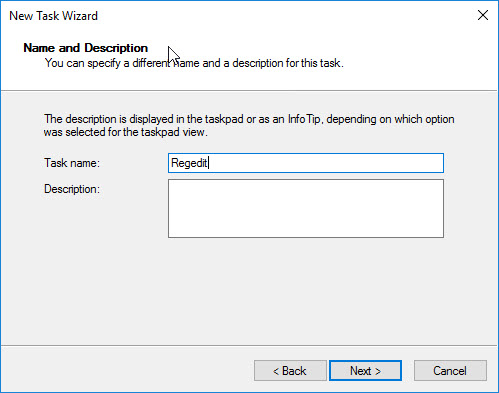
Enter a description for the task item. Click Next.
Select an icon for the task item.
Click Next.
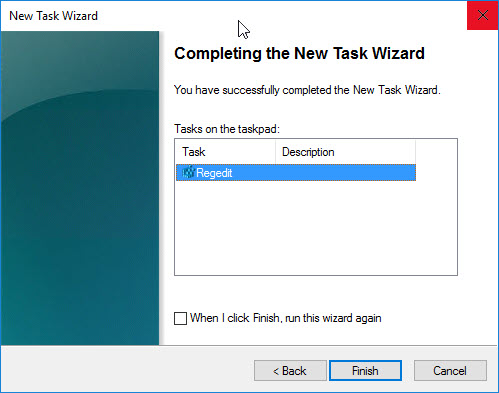
You can run the New Task Wizard multiple times by ticking the box below. Otherwise click Finish.
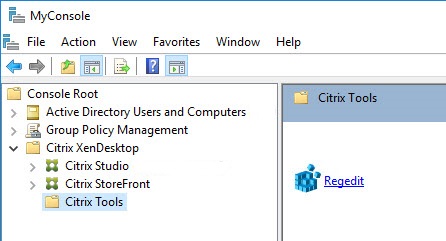
The task Regedit has now been added to the taskpad.
Make sure to save the MMC console.
Edit MMC, edit taskpad and add more tasks
In the previous section we created a custom MMC with one taskpad and one item (Regedit).
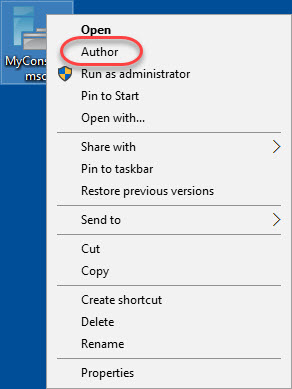
To further customize or edit your MMC, select the console file (MyConsole.msc) and with a right-mouse click select Author.
In order to add more tasks to an existing taskpad, select the snap-in that contains the taskpad and with a right-mouse click select Edit Taskpad View.
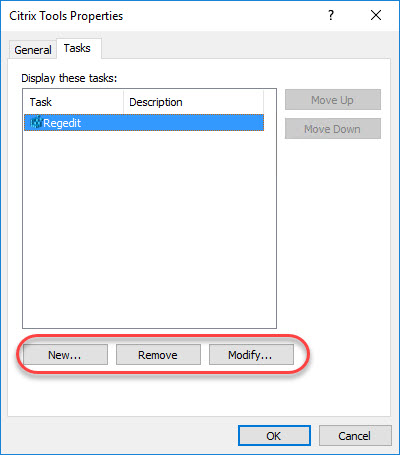
On the Tasks tab you can create new tasks or modify or remove existing tasks.
Let me give you some tips how to add tasks other than an executable.
- To add a file share simply add \\Server\Share to the command line box:
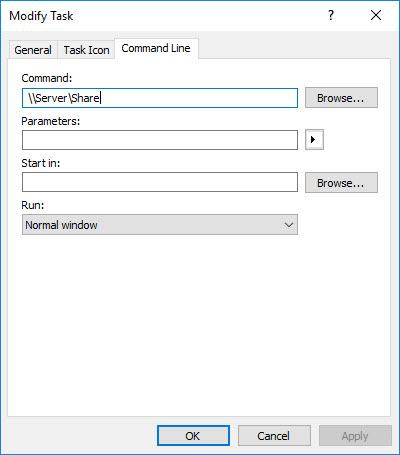
- To add a PowerShell script enter powershell.exe in the command line box and enter, for example, the following parameters in the parameters box: -nologo -executionpolicy bypass -file “C:\MyScripts\Citrix\XD_7x_Config.ps1” (please adjust the parameters to your environment)..

Copy source files to the local machine
Last but not least make sure to copy any executables, tools and/or scripts to the location you specified in your task items.
One handy way how to copy both the custom MMC as well as the source files is to use a Group Policy Preference item.
First, prepare a network share that is used for administrative purposes only. Copy all your sources to this share.
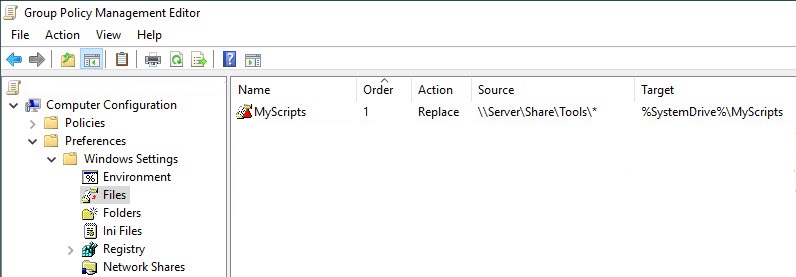
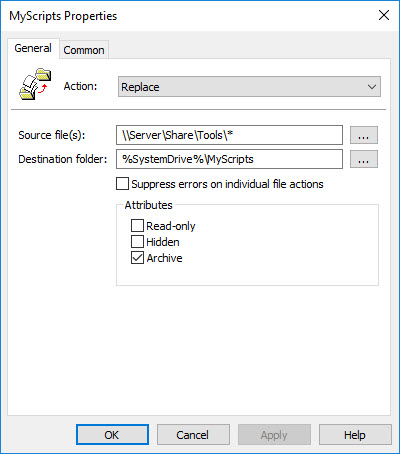
Next, use the Files Group Policy Preference item to copy the source files from the share to, for example, a local directory (e.g. C:\MyScripts) on all your servers.
| Important: make sure that the local machine account has read access rights on the share! Otherwise the files cannot be copied. In case you do not have a dedicated Active Directory security group that contains your computer accounts, add Domain Computers to the ACL on the share and assign at minimum Read rights. |
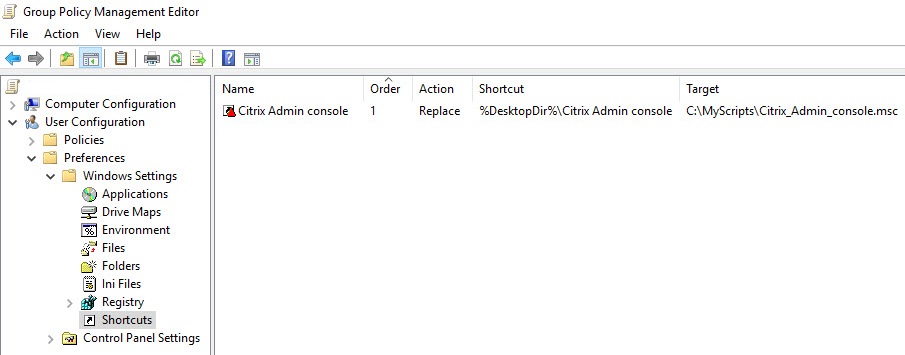
To make life as an administrator even more enjoyable, you could even decide to create a desktop shortcut to the custom MMC using a Shortcut Group Policy Preference item.
And that is it! I hope that this simple, but effective, solution helps you in your environment.
Dennis Span works as a Principal Account Technology Strategist at Cloud Software Group in Vienna, Austria. He holds multiple Citrix certifications (CCE-V). Dennis has been a Citrix Technology Advocate (CTA) since 2017 (+ one year as Citrix Technology Professional, CTP). Besides his interest in virtualization technologies and blogging, he loves spending time with his family as well as snowboarding, playing basketball, and rowing. He is fluent in Dutch, English, German, and Slovak and speaks some Spanish.





Hello, my name is Serge in France
I am in a Citrix Architecture 7.15 LTSR with Windows servers 2012 R2 My console Citrix Studio is very slow
to the loading. Can you help me.
Thank you
Hi Serge,
Is the loading of Studio slow or is working within the console slow? There seems to be a known issue concerning XenDesktop 7.12 and Windows Server 2012 R2 described here: https://support.citrix.com/article/CTX232123. Perhaps this also applies to XenDesktop 7.15. Also, make sure to update to the latest hotfix level, XenDesktop 7.15 CU 3 (https://docs.citrix.com/en-us/xenapp-and-xendesktop/7-15-ltsr/whats-new/cumulative-update-3.html). Also make sure that the two files “C:\Windows\System32\mmc.exe.config” and “C:\Windows\SysWOW64\mmc.exe.config” exist (https://support.citrix.com/article/CTX120115).
Kind regards,
Dennis
Nice Job. This is perfect! Gracias.
Thanks Luis!