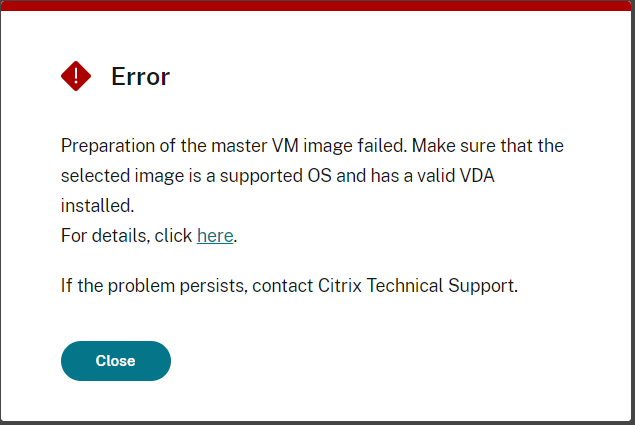
In this article, I will show you how to solve the error “Preparation of the master VM image failed” in Citrix Machine Creation Services (MCS).
| Note: many thanks to Amar Patel for his input! |
Sometimes, when provisioning a new machine catalog in Citrix Machine Creation Services (MCS) the message Preparation of the master VM image failed appears. The message is quite general and does not provide too many details.
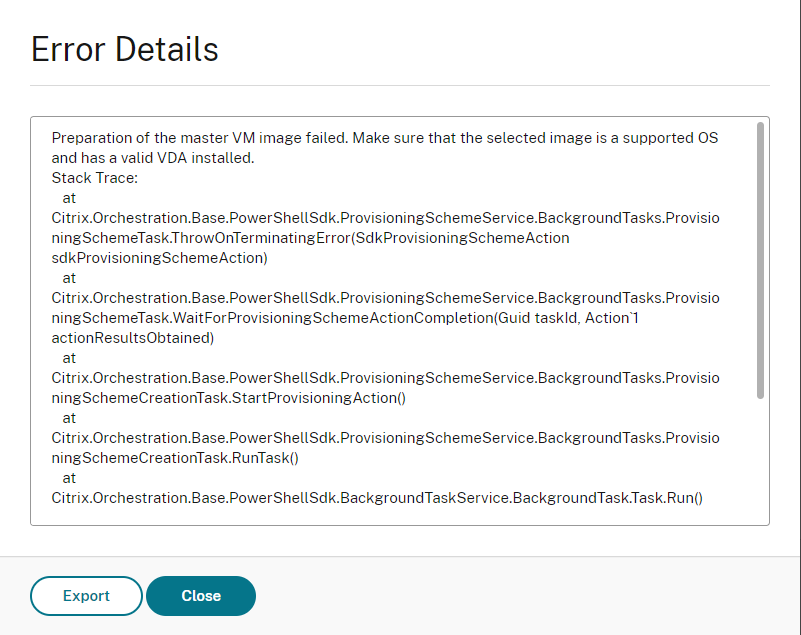
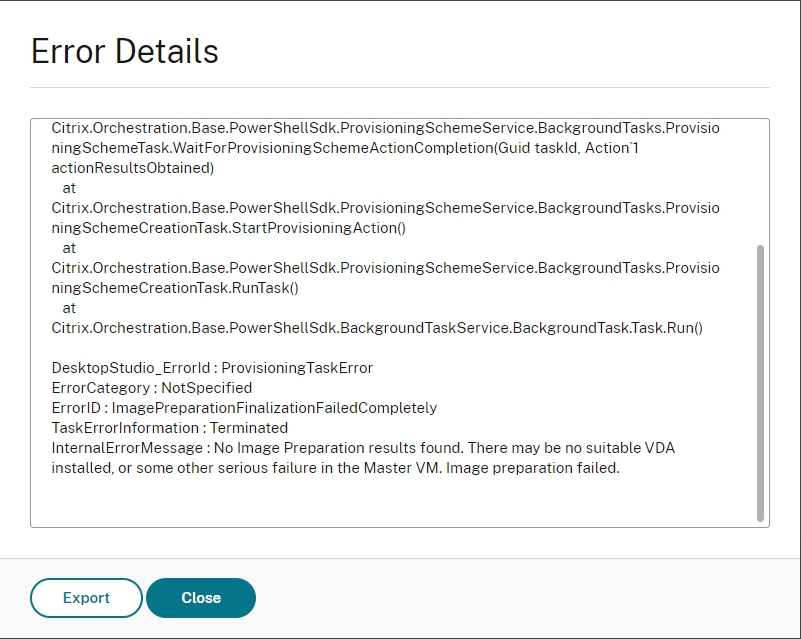
The two screenshots below show the detailed error log. One of the main errors is:
Error ID: ImagePreparationFinalizationFailedCompletely
In Citrix Studio the machine catalog is created, but with an error.
When creating or updating a new machine catalog, MCS copies a snapshot of the master image to each storage location. A temporary preparation virtual machine (VM) is created from this copy. Please note that the preparation VM is disconnected from the network.
The machine is powered on and some actions are performed. Afterward, the machine is shut down. Sometimes, this process ends in an error. You can see this preparation VM in the management console of your hypervisor or hyperscaler (e.g. Azure).
- On-prem hypervisor: the name of the VM is Preparation <catalog name>
- Cloud-based hyperscaler (e.g. Azure): the name of the VM is Preparati-xxx
The main steps that are performed on the preparation VM are:
- Enable DHCP
- Microsoft Windows KMS Rearm
- Microsoft Office KMS Rearm
I see the above error message regularly during PoCs with customers. In most cases, the two main causes are:
- No VDA is installed on the master virtual machine (or snapshot of that machine) or something went wrong during the installation. In this case, (re)install the VDA. I recommend rebooting the machine once again after successful installation.
- The VDA is installed, but not configured to be used as an MCS master image. The error message does indicate that there may be an issue with the VDA -> Make sure that the selected image […] has a valid VDA installed. However, the issue is not the installation, but rather the configuration of the VDA. When installing the VDA make sure to select the option Create a master MCS image.

Note: in case you do not want to reinstall the VDA, modifying the following registry value should be sufficient (in theory):
I never tested this, but this registry value is what is configured when selecting Create a master MCS image during the installation of the VDA, so it might work. |
If the VDA is installed and configured correctly and you still receive errors trying to create a new machine catalog, the next step is to analyze the process of the preparation VM.
The following three options, or a combination of some, are available to you:
1 – Troubleshoot the preparation VM
This requires you to enable logging on the master virtual machine and to modify the MCS provisioning scheme to prevent the preparation VM from shutting down. On the master virtual machine set the following registry value:
Hive: HKEY_LOCAL_MACHINE
Key path: Software\Citrix\MachineIdentityServiceAgent
Value name: LOGGING
Value type: DWORD
Value data: 1
Create a new or update an existing machine catalog based on the updated master virtual machine. The image preparation operation will now create two log files on the preparation VM. These are “C:\image-prep.log” and “C:\PvsVmAgentLog.txt”.
| Note: the name PvsVmAgentLog.txt has nothing to do with Citrix Provisioning Server (PVS)! PvsVmAgent is strictly an MCS service, but the name can be confusing! |
Modify the MCS provisioning scheme to prevent the preparation VM from shutting down.
The command for new catalogs is:
|
1 |
Set-ProvServiceConfigurationData -Name ImageManagementPrep_NoAutoShutdown -Value $True |
The command for existing catalogs is:
|
1 |
Set-ProvSchemeMetadata -ProvisioningSchemeUid xxxxxxx -Name ImageManagementPrep_NoAutoShutdown -Value $True |
The Provisioning Scheme UID of an existing machine catalog can be retrieved with the following command:
|
1 |
Get-ProvScheme |
The default time-out value of the image preparation is 20 minutes, so you may want to increase the time-out. The value is defined in minutes.
The command for new catalogs is:
|
1 |
Set-ProvServiceConfigurationData -Name ImageManagementPrep_PreparationTimeout -Value 600 |
The command for existing catalogs is:
|
1 |
Set-ProvSchemeMetadata -ProvisioningSchemeUid xxxxxxx -Name ImageManagementPrep_PreparationTimeout -Value 600 |
To see if the new configurations were set correctly, use one of the following commands:
The command for new catalogs is:
|
1 |
Get-ProvServiceConfigurationData |

The command for existing catalogs is:
|
1 |
Set-ProvSchemeMetadata -ProvisioningSchemeUid xxxxxxx |
2 – Remove all image preparation steps
One possible solution is to remove the image preparation step completely from the MCS process. This is done by modifying the MCS provisioning scheme. The command for new catalogs is:
|
1 |
Set-ProvServiceConfigurationData -Name ImageManagementPrep_DoImagePreparation -Value $false |
The command for existing catalogs is:
|
1 |
Set-ProvSchemeMetadata -ProvisioningSchemeUid xxxxxxx -Name ImageManagementPrep_DoImagePreparation -Value $false |
The Provisioning Scheme UID of an existing machine catalog can be retrieved with the following command:
|
1 |
Get-ProvScheme |
3 – Modify individual image preparation steps
If the troubleshooting in step 1 reveals that there is an issue with an individual step in the MCS preparation process, you may choose to exclude this step. This requires us to modify the MCS provisioning scheme.
Skip Enable DHCP:
The command for new catalogs is:
|
1 |
Set-ProvServiceConfigurationData -Name ImageManagementPrep_Excluded_Steps -Value EnableDHCP |
The command for existing catalogs is:
|
1 |
Set-ProvSchemeMetadata -ProvisioningSchemeUid xxxxxxx -Name ImageManagementPrep_Excluded_Steps -Value EnableDHCP |
The Provisioning Scheme UID of an existing machine catalog can be retrieved with the following command:
|
1 |
Get-ProvScheme |
Skip Microsoft Windows KMS Rearm:
The command for new catalogs is:
|
1 |
Set-ProvServiceConfigurationData -Name ImageManagementPrep_Excluded_Steps -Value OsRearm |
The command for existing catalogs is:
|
1 |
Set-ProvSchemeMetadata -ProvisioningSchemeUid xxxxxxx -Name ImageManagementPrep_Excluded_Steps -Value OsRearm |
The Provisioning Scheme UID of an existing machine catalog can be retrieved with the following command:
|
1 |
Get-ProvScheme |
Skip Microsoft Office KMS Rearm:
The command for new catalogs is:
|
1 |
Set-ProvServiceConfigurationData -Name ImageManagementPrep_Excluded_Steps -Value OfficeRearm |
The command for existing catalogs is:
|
1 |
Set-ProvSchemeMetadata -ProvisioningSchemeUid xxxxxxx -Name ImageManagementPrep_Excluded_Steps -Value OfficeRearm |
The Provisioning Scheme UID of an existing machine catalog can be retrieved with the following command:
|
1 |
Get-ProvScheme |
| Note: changes made to the MCS provisioning scheme for new machine catalogs are global (set on the farm/site level) and thus apply whenever a new machine catalog is created, now or in the future. Therefore, it is best practice to remove any custom changes after you are finished with your troubleshooting or machine catalog creation.
Remove-ProvServiceConfigurationData -Name ImageManagementPrep_$$ITEM$$ Replace the variable $$ITEM$$ with the actual value, for example, ImageManagementPrep_NoAutoShutdown. |
When working with Citrix Cloud and in particular, Citrix DaaS, additional steps are required to connect to your Cloud-hosted Citrix farm using PowerShell.
The following steps explain how to connect to your organization’s Citrix Cloud tenant using PowerShell.
- Download the Virtual Apps and Desktop Remote PowerShell SDK from the Citrix website: https://www.citrix.com/downloads/citrix-cloud/product-software/xenapp-and-xendesktop-service.html
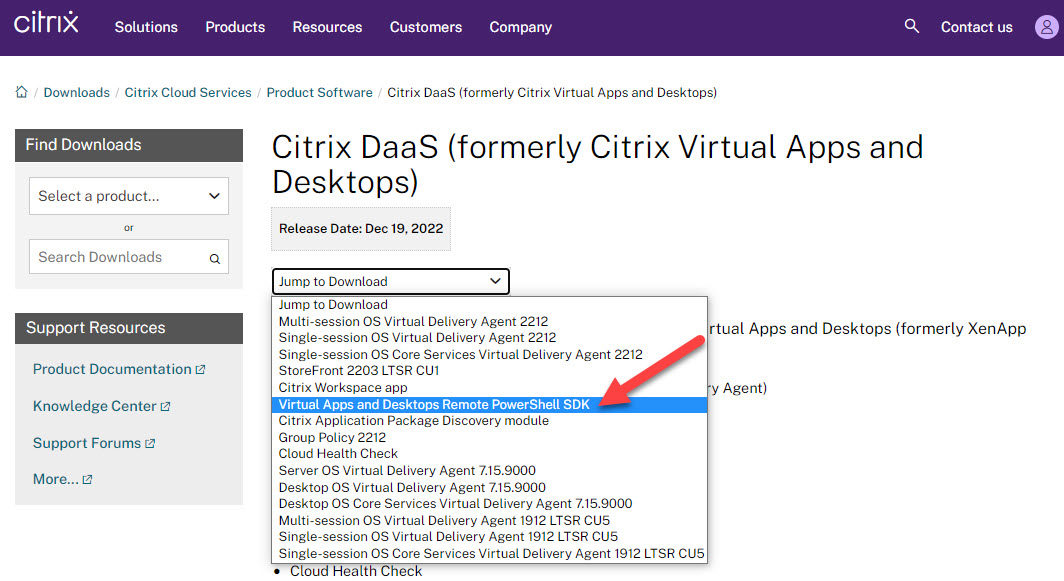
- Install the CitrixPoshSdk.exe on your local machine or management server
- Open a new PowerShell window and connect to your organization’s Citrix Cloud tenant by entering the following command:
1Get-XDAuthentication

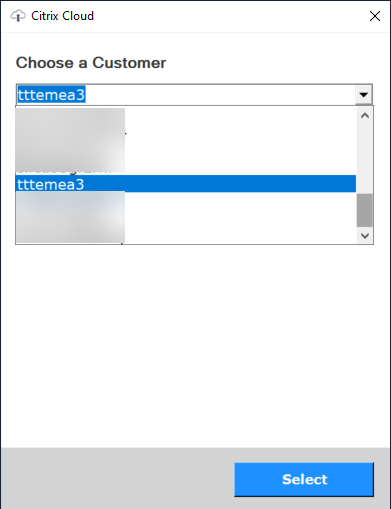
A Citrix Cloud login window is launched. Enter your credentials and log on. In case you are an administrator of more than one Citrix Cloud tenant, select the appropriate tenant. - Enter the PowerShell command(s) listed in the above sections (the same as you would in an on-prem Citrix farm). For example:
1Set-ProvServiceConfigurationData -Name ImageManagementPrep_NoAutoShutdown -Value $True
This article is partly based on the following articles. I recommend that you read them.
- Machine Creation Service: Image Preparation Overview and Fault-Finding (https://www.citrix.com/blogs/2016/04/04/machine-creation-service-image-preparation-overview-and-fault-finding/)
- Error: “Preparation of the Master VM Image failed” when CREATING MCS Catalog (https://support.citrix.com/article/CTX140734)
- Error: “Preparation of the Master VM Image failed” When UPDATING a Catalog (https://support.citrix.com/article/CTX217456)
- Carl Stalhood -> Catalogs, Delivery Groups, Zones, section MCS – Image Prep (https://www.carlstalhood.com/catalogs-delivery-groups/#imageprep)
I hope this article was of some help to you. If you have any additional input or questions please leave a comment below.
Dennis Span works as a Lead Account Technology Strategist at Cloud Software Group in Vienna, Austria. He holds multiple Citrix certifications (CCE-V). Dennis has been a Citrix Technology Advocate (CTA) since 2017 (+ one year as Citrix Technology Professional, CTP). Besides his interest in virtualization technologies and blogging, he loves spending time with his family as well as snowboarding, playing basketball and rowing. He is fluent in Dutch, English, German and Slovak and speaks some Spanish.

